Difference between revisions of "Advanced Top Viewer Features"
| Line 10: | Line 10: | ||
=== Window background colour === | === Window background colour === | ||
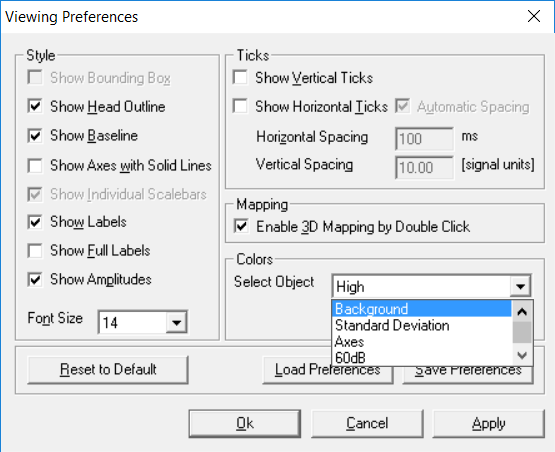
Change the background color for using Top Viewer in illustrations by selecting “View | Preferences” from the menu. In the dialog box that appears, use the dropdown list in section “Colors” to select “Background” and then press the “Choose Color” button in that section. You can save the Top Viewer display as bitmap or eps file from the File menu. | Change the background color for using Top Viewer in illustrations by selecting “View | Preferences” from the menu. In the dialog box that appears, use the dropdown list in section “Colors” to select “Background” and then press the “Choose Color” button in that section. You can save the Top Viewer display as bitmap or eps file from the File menu. | ||
| + | |||
[[File:TopView_Preferences.png|none]] | [[File:TopView_Preferences.png|none]] | ||
=== Channel overplot === | === Channel overplot === | ||
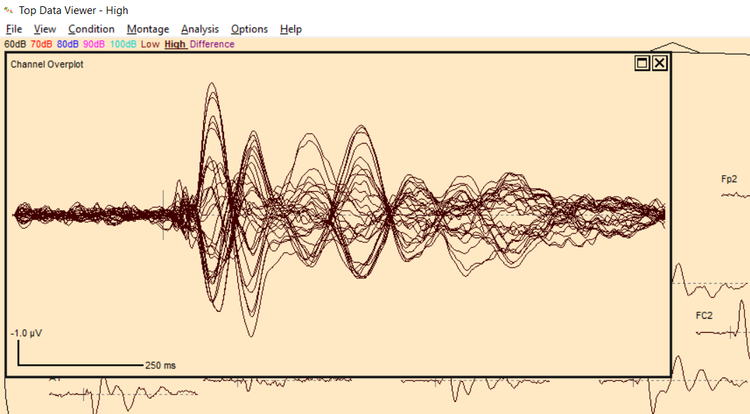
Show an overplot of all channels by using the “View → Show Overplot Window” menu entry. You can select which channels will be plotted in “View → Select Overplot Channels”. | Show an overplot of all channels by using the “View → Show Overplot Window” menu entry. You can select which channels will be plotted in “View → Select Overplot Channels”. | ||
| − | [[File:TopView_Overplot.png| | + | |
| + | [[File:TopView_Overplot.png|750px]] | ||
=== Condition overplot === | === Condition overplot === | ||
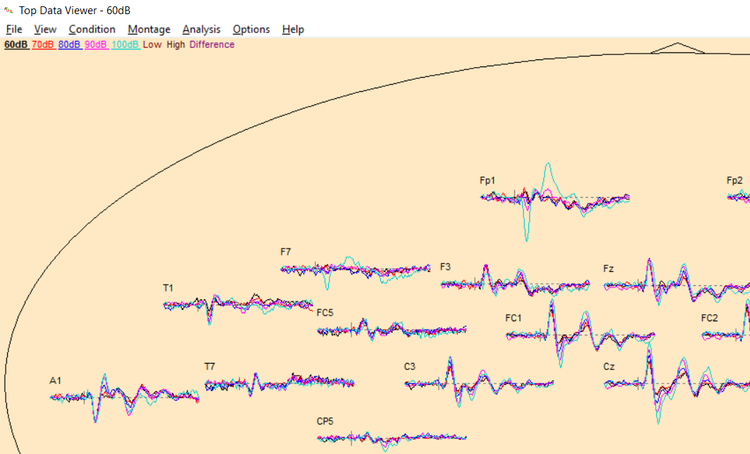
Show an overplot of several conditions by simply clicking on the condition label on the top left and holding down CTRL or SHIFT keys to select several conditions. The last condition clicked (bold print) is the relevant one for amplitude displays and mapping. | Show an overplot of several conditions by simply clicking on the condition label on the top left and holding down CTRL or SHIFT keys to select several conditions. The last condition clicked (bold print) is the relevant one for amplitude displays and mapping. | ||
| − | [[File:TopView_Overplotcnds.png| | + | |
| + | [[File:TopView_Overplotcnds.png|750px]] | ||
=== Additional channel plot === | === Additional channel plot === | ||
| Line 24: | Line 27: | ||
* In “Montage → Additional Channels”, select the set of additional channels from the list that appears. | * In “Montage → Additional Channels”, select the set of additional channels from the list that appears. | ||
* Should your channel set not appear, then go back to the Montage Editor and create an Additional Channels montage by pressing the ‘N’ key to create a new ''Edit Montage'', dragging your channels over to the channel list, and saving it as a user montage (select Montage type “Additional Channel montage” in the Save dialog box). Then your channel set will be available in the Top Viewer. | * Should your channel set not appear, then go back to the Montage Editor and create an Additional Channels montage by pressing the ‘N’ key to create a new ''Edit Montage'', dragging your channels over to the channel list, and saving it as a user montage (select Montage type “Additional Channel montage” in the Save dialog box). Then your channel set will be available in the Top Viewer. | ||
| − | [[File:Top_Viewer.jpg| | + | |
| + | [[File:Top_Viewer.jpg|750px]] | ||
[[Category:ERP/ERF]] | [[Category:ERP/ERF]] | ||
Revision as of 07:54, 17 May 2017
| Module information | |
| Modules | BESA Research Basic or higher |
| Version | 5.2 or higher |
Contents
Introduction
The BESA Top Viewer, which is part of the BESA Research Basic package, offers many interesting features to view and analyze your ERP data. Let us just point out some of the lesser known features here:
Window background colour
Change the background color for using Top Viewer in illustrations by selecting “View | Preferences” from the menu. In the dialog box that appears, use the dropdown list in section “Colors” to select “Background” and then press the “Choose Color” button in that section. You can save the Top Viewer display as bitmap or eps file from the File menu.
Channel overplot
Show an overplot of all channels by using the “View → Show Overplot Window” menu entry. You can select which channels will be plotted in “View → Select Overplot Channels”.
Condition overplot
Show an overplot of several conditions by simply clicking on the condition label on the top left and holding down CTRL or SHIFT keys to select several conditions. The last condition clicked (bold print) is the relevant one for amplitude displays and mapping.
Additional channel plot
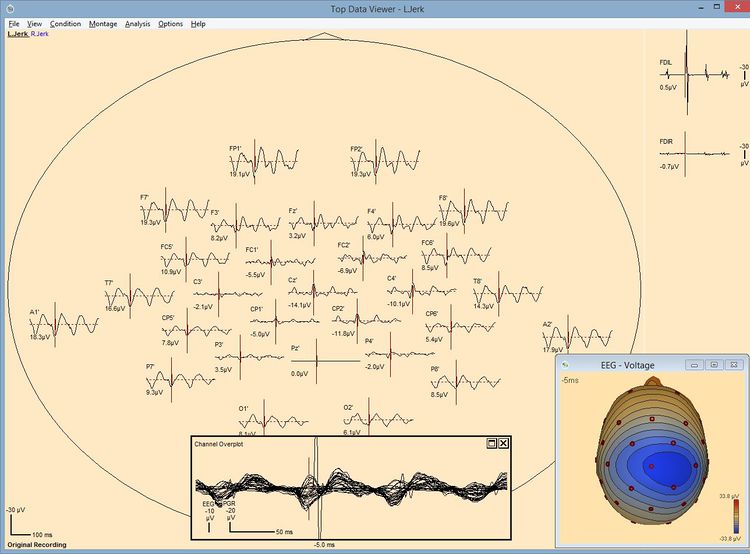
Show polygraphic, myographic, or virtual channels beside the Top Viewer montage display by using the Additional Channels option (see example screen shot below from a recording with additional FDI channels):
- In “Montage → Additional Channels”, select the set of additional channels from the list that appears.
- Should your channel set not appear, then go back to the Montage Editor and create an Additional Channels montage by pressing the ‘N’ key to create a new Edit Montage, dragging your channels over to the channel list, and saving it as a user montage (select Montage type “Additional Channel montage” in the Save dialog box). Then your channel set will be available in the Top Viewer.


